My Step-by-Step Routine for Switching from Air Drying to Blow Drying
You are tired of flat hair, right? Or perhaps, your air-dried hair just never looks the way you want it to. I get it. We are going to go over exactly how to get that bouncy, salon-worthy finish using your blow dryer. It’s easier than you think, I promise.

Why Blow Drying Can Be Your Hair’s Best Friend
Listen, I hear the whispers. People say blow-drying damages your hair. Well, my friend, so does existing in a city with pollution, or even just aggressively towel-drying. The truth is, when done correctly, blow-drying can give your hair body, shine, and a polished look that air drying often cannot. You just need to know the right moves.
The Great Debate: Air Drying versus Blow Drying
Air drying is convenient, yes. You just wash and go, or so you hope. But often, it leaves hair a little limp, sometimes frizzy, and rarely a masterpiece. Blow drying, when done with a good technique and the proper hair tools, actually helps smooth the cuticle, boost volume, and lets you manipulate your hair into the style you want. You are basically taking control of your hair’s destiny.
My Own Journey from Air-Dry Enthusiast to Blow-Dry Believer
For years, I stubbornly air-dried. My hair was always “fine,” you know? But it never truly shined. One day, after a particularly bad hair day that involved more frizz than human hair should have, I decided to really learn how to blow dry. It was a game-changer. My hair looked better, felt softer, and genuinely seemed healthier because I was not just letting it do whatever it wanted in its natural drying process. You can do it too.
Pre-Blow Drying Prep: The Foundation for Fabulous Hair
You cannot just grab a blow dryer and go at it. That is like trying to bake a cake without any ingredients. You need to prepare your hair for the heat and styling. This preparation is what separates a good hair day from a great hair day.
Shampoo and Conditioner: The Starting Line
Always begin with a clean canvas. Use a shampoo and conditioner appropriate for your hair type. For example, if you have fine hair, use volumizing products. If your hair is prone to frizz, opt for smoothing formulas. This first step sets the stage for everything else.
Towel Drying: Blot, Do Not Rub!
This is a big one. After washing, gently squeeze excess water from your hair. Then, lovingly blot your hair with a microfiber towel. A regular cotton towel works too, just be gentle. Do not rough up your hair; this creates frizz and roughs up the cuticle. You are trying to coax your hair, not battle it.
Detangle with Care: Wide-Tooth Comb is Your Pal
Once your hair is about 60% dry, gently detangle it with a wide-tooth comb. You want to start from the ends and work your way up to the roots. This prevents breakage, especially if your hair is delicate when wet. Think of it as a gentle walk through the park, not a sprint.
Heat Protectant: Your Hair’s Bodyguard
Apply a generous amount of heat protectant to your damp hair. This product creates a barrier between your hair and the heat from the blow dryer. It is like sunscreen for your hair, preventing heat damage and keeping your strands healthy. Do not skip this step, seriously.
Styling Products: The Secret Sauce for Blowout Perfection
Different products do different things. You want to layer them strategically for the best results. It is all about giving your hair the right support system.
- For Volume: A volumizing mousse or root lift spray works wonders. Apply it directly to the roots before you even pick up your blow dryer.
- For Smoothness and Shine: A smoothing cream or serum applied to the mid-lengths and ends will battle frizz and add shine. My personal favorite contains argan oil for an extra boost.
- For Hold: A light holding spray can be used at the very end, but for now, focus on the initial styling products.
My Go-To Product Cocktail for a Bouncy Blowout
I love a good cocktail, and not just the kind you drink. My hair product cocktail usually involves:
- A dime-sized amount of a lightweight leave-in conditioner to help with detangling and moisture.
- A golf ball-sized amount of volumizing mousse specifically at the roots.
- A pea-sized amount of a smoothing serum for the ends, especially my really dry areas.
This combination gives me volume where I want it and smoothness where I need it, without weighing anything down. You will find your perfect mix, just experiment a little bit.
The Blow Drying Technique: From Damp to Dazzling
This is where the magic happens. You need the right tools and the right motions. It is a dance, really, between your hair, your brush, and your blow dryer.
Choosing Your Tools: Blow Dryer and Brushes
You need a good quality blow dryer with at least two heat settings and a cool shot button. A concentrator nozzle is also a must-have; it directs the airflow. For brushes, you will want a round brush for volume and smoothness. A paddle brush is great for general drying and detangling.
| Tool | Purpose | Pro Tip |
|---|---|---|
| Blow Dryer with Nozzle | Directs airflow, reduces frizz | Always use the nozzle for a smooth finish. |
| Round Brush (Medium) | Creates volume, curls ends, smooths | Match brush size to hair length. Smaller for tighter curls. |
| Paddle Brush | General drying, detangling, smoothing straight looks | Great for a quick rough dry before sectioning. |
Rough Drying: Getting Started Right
Before you even think about sectioning, rough dry your hair until it is about 70-80% dry. Use medium heat and medium speed, moving the dryer constantly. You can use your fingers to lift the roots for initial volume. This step cuts down on drying time and reduces heat exposure. Do not forget to keep moving the dryer.
Sectioning Your Hair: Patience is a Virtue
Divide hair into manageable sections using clips. Start from the bottom layer. This makes the process much less overwhelming and ensures every strand gets attention. Think of it as painting a masterpiece; you would not just slop paint everywhere, would you?
The Actual Blow Drying: Pull, Point, and Roll
Now, take a small section of hair. Place your round brush underneath it at the roots. Point the blow dryer’s nozzle down the hair shaft, following the brush as you pull it through.
- For Volume: Lift the section up and away from your scalp as you dry the roots.
- For Smoothness: Pull the section taut with the brush, directing the airflow straight down the hair shaft.
- For Curved Ends: Once you reach the ends, gently roll the brush inwards or outwards and blast with heat.
Repeat this process section by section, working your way up your head. Make sure each section is completely dry before moving on. Damp hair will just revert to its air-dried self.
The Cool Shot: Setting Your Style
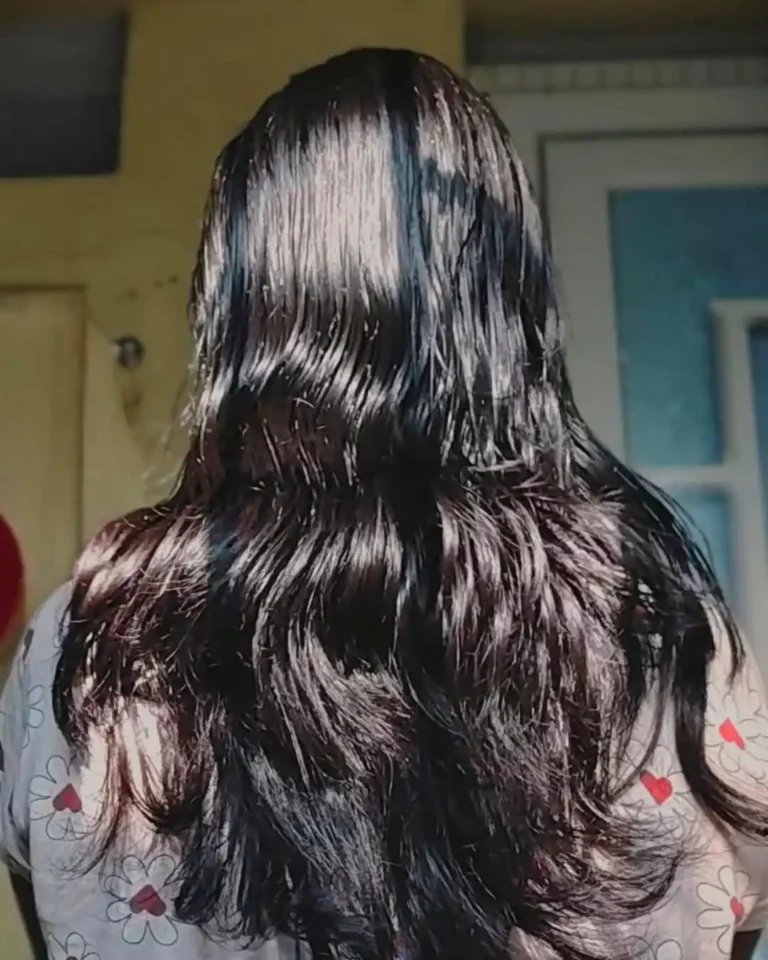
When each section is dry, hit it with the cool shot button on your blow dryer. This blast of cool air helps to seal the cuticle, lock in the style, and add incredible shine. It is like setting hairspray, but natural. My hair looks so much better when I do this.
Post-Blow Drying Perfection: The Finishing Touches
You are almost there. Your hair looks amazing, but a few final steps will make it last and look even more polished.
Serum or Oil for Shine and Frizz Control
Once your hair is completely dry and cool, take a tiny bit of lightweight serum or hair oil. Rub it in your palms and gently smooth it over your hair, focusing on the mid-lengths and ends. This adds shine and tames any lingering flyaways. Do not overdo it, a little goes a long way.
Light Hairspray for Hold, If Needed
If you want extra hold, a light mist of hairspray will do the trick. Hold the can about 10-12 inches away from your head and spray evenly. Avoid making your hair stiff or crunchy. You want natural movement.
Don’t Touch Too Much!
Resist the urge to run your fingers through your hair constantly. The more you touch, the more you can create frizz and break down the style you just worked hard to create. Admire it in the mirror, but keep your hands mostly to yourself.
Troubleshooting Common Blow Drying Blunders
Even the pros make mistakes. It is okay. Learning from them is how you get better. Here are some common problems and how to fix them.
Too Much Frizz?
You are probably not using enough heat protectant or your hair is not completely dry. Your nozzle might be off too, which makes a big difference. Also, make sure you are always pointing the airflow down the hair shaft; drying against the cuticle creates frizz.
Flat Roots?
You are probably not lifting the roots enough with your brush. Use a volumizing mousse and make sure you are directing the heat right at the roots, lifting your hair upwards as you dry. Rough dry your roots first too, upside down if you want extra oomph.
Hair Feels Dry or Brittle?
Your heat settings might be too high, or you are not using enough heat protectant. Also, make sure your hair is adequately conditioned before you start. Consider a weekly hair mask for extra moisture.
Why Does My Hair Not Hold Volume?
This is a common one. Your hair might be too wet when you start sectioning. Make sure it is at least 70-80% rough-dried. Also, not using the cool shot effectively will cause the volume to fall quickly. And sometimes, your hair type just needs a little extra help from a good volumizing product.
Frequently Asked Questions
What is the best heat setting for blow drying?
You should generally use medium heat for most of your blow drying. High heat can cause more damage, especially on fine or color-treated hair. The cool shot setting is for sealing the style.
How often should I blow dry my hair?
You can blow dry your hair as often as you wash it, provided you use proper heat protectant and good technique. Listen to your hair; if it starts feeling dry or brittle, give it a break from heat styling or use extra moisturizing treatments.
Can I blow dry curly hair straight?
Yes, you absolutely can! It usually requires more tension with your brush and perhaps a smoothing balm. Dry small sections at a time, pulling the hair taut with a round brush to smooth out the curls. Finish with a serum for a sleek look.