My Tried-and-True Best Heat Styling Routine to Avoid Color Damage
Let’s talk about something super important if you love both your hair color AND your hot tools: heat styling without totally wrecking that gorgeous shade!
You know the feeling – you spend time getting that perfect blonde, rich brunette, or vibrant red, then you grab your flat iron or curling wand, and suddenly… is it looking kinda dull? A little brassy maybe? Or worse, feeling dry and snapping off?
Ugh, its the absolute worst feeling, like choosing between great color and great style.
As a stylist, I see the struggle! Heat is probably one of the biggest culprits when it comes to color fading and damage, right up there with washing too much or using the wrong products. But lets be real, telling everyone to just ditch their hot tools forever isn’t practical for most people.
The good news? You can have both! You just need the best heat styling routine to avoid color damage. It’s all about being smart, protective, and using the right techniques.
My Tried-and-True Best Heat Styling Routine to Avoid Color Damage
So, why is heat such a villain for colored hair? Two main reasons:
- Direct Damage: High heat literally cooks the hair strand. It degrades the proteins that make up your hair, weakens the structure, and roughens up that outer cuticle layer. A damaged, rough cuticle reflects light poorly (bye-bye shine!) and can’t hold onto color molecules effectively.
- Color Molecule Degradation: Heat can actually break down the artificial color molecules deposited in your hair, causing them to fade or even change tone (hello, unwanted brassiness!).
Scary, right? But totally manageable with the right heat styling routine. This isn’t about complicated steps, just smart habits to build into your styling sessions.
Step 1: Don’t Style Soaking Wet Hair (Especially with Irons!)
This applies mainly to flat irons and curling irons/wands. Using these on damp hair is a recipe for disaster.
- Why? You’re essentially boiling the water inside your hair strand. That steam causes major internal damage (bubbles can literally form inside the hair shaft – eek!) and forces the cuticle open violently. It’s like a mini-explosion on each strand.
- Blow Drying Exception: Obviously, you blow dry damp hair. BUT, try to let your hair air dry as much as possible first (like 70-80% dry) before hitting it with the dryer. This minimizes the time its exposed to direct heat. Use the dryer on a medium heat setting, not scorching hot.
- The Rule: For direct-contact tools (irons, wands), your hair should be 100% BONE DRY. No exceptions if you want to avoid color damage.
Step 2: Heat Protectant – Your Non-Negotiable MUST HAVE!
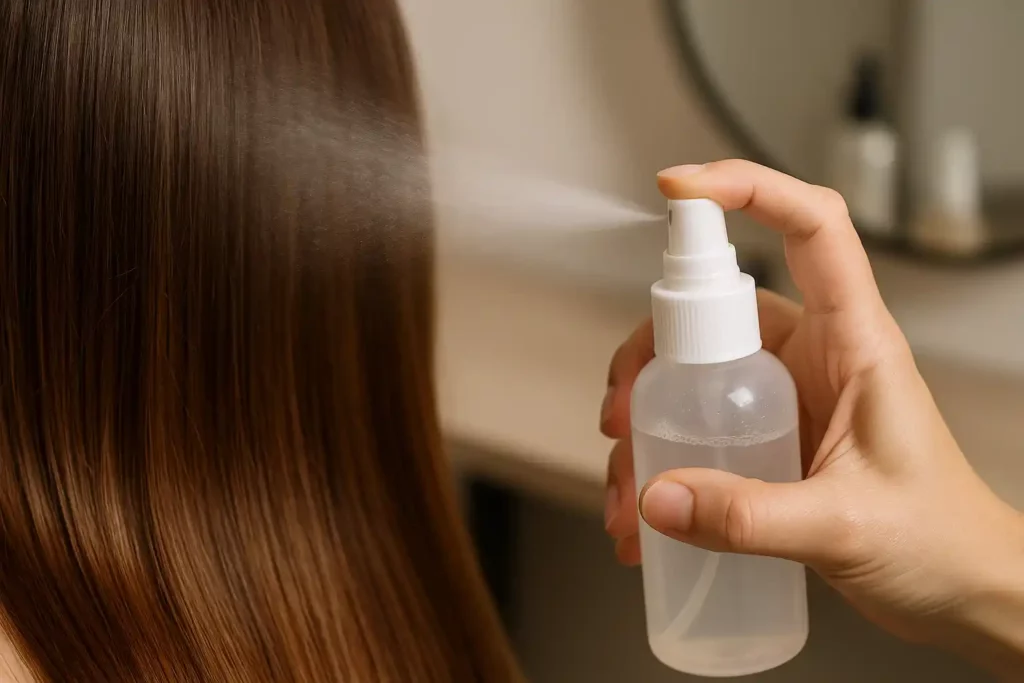
If you only follow ONE step in this best heat styling routine, let it be this one. PLEASE! I cant stress this enough.
- What it Does: Heat protectants create a shield between your hair and the hot tool. They contain ingredients (often silicones, polymers, or natural oils) that:
- Slow down heat conduction.
- Distribute heat more evenly.
- Help seal the cuticle.
- Reduce moisture loss.
- How to Use It:
- Choose one designed for your hair type (fine, thick, etc.) and preferably one that mentions color protection. Sprays are great for all-over coverage, serums/creams might be better for thicker hair or targeted application on ends.
- Apply it to damp hair before blow-drying AND/OR to dry hair before using irons or wands. Yes, you might need it twice!
- Apply section by section! Don’t just mist the top layer. Lift sections and spray evenly from roots to ends (or wherever you’ll be applying heat) to ensure everything is coated.
- Comb it through to distribute evenly.
Seriously, skipping heat protectant is like sunbathing without sunscreen – you’re just asking for damage! It’s the cornerstone of avoiding color damage from heat.
Step 3: Lower the Temperature! You Don’t Need Max Heat!
This is a huge mistake I see people make. Cranking your flat iron or curling wand up to 450°F (230°C) because you think hotter means faster or better styling is just… no. Especially not for color-treated hair, which is often more fragile.
- Find Your Sweet Spot: Most hair types, especially fine or chemically treated hair, can be styled effectively at much lower temperatures. Start around 300-350°F (150-175°C) and only go slightly higher if absolutely necessary for your hair texture to get the result you want. Coarser hair might need a bit more, but rarely the maximum setting.
- Test it Out: Start low and see if it works. You might be surprised!
- Why Lower is Better: Less heat = less damage to the hair structure = less damage to the color molecules = less fading! Simple equation!
Step 4: One and Done – Minimize Passes
Dragging your flat iron over the same section of hair again and again and again? Stop!
- Work Efficiently: Use smooth, steady movements. With the right temperature and good tension, you should only need one or two passes per section with an iron.
- Curling Wands: Hold the hair on the wand just long enough for the curl to set (usually just a few seconds), then release. Don’t hold it endlessly “just to be sure.”
- Less Exposure = Less Damage: Every extra pass or second of heat exposure increases the risk of damage and color fade. This efficiency is key to the best heat styling routine.
Step 5: Tool Time – Does Quality Matter?
Yes, to some extent. While technique and protection are paramount, the materials your tools are made of can make a difference.
- Look For: Tools with ceramic, tourmaline, or titanium plates/barrels. These materials tend to heat more evenly and provide a smoother glide, reducing snagging and potential hot spots compared to basic metal plates.
- Variable Heat Settings: Absolutely essential! Avoid tools with only on/off or high/low. You need precise temperature control (see Step 3!).
- Size Matters: Use the appropriate barrel size for curls or plate width for straightening to work efficiently on your sections.
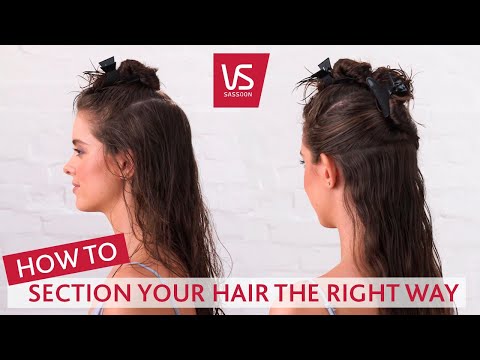
Step 6: Section Your Hair, Seriously!
Trying to style huge chunks of hair at once is inefficient and damaging.
- Why Section? Working with smaller, manageable sections (like 1-2 inches wide) allows the heat to distribute evenly through that section. This means you get the style you want with fewer passes and potentially lower heat.
- How: Use clips to keep the rest of your hair out of the way while you focus on one section at a time. Start from the bottom layers and work your way up. It might seem slower, but it’s actually faster and much better for your hair and color!
Step 7: The Cool Down & Finish
- Cool Shot (Blow Drying): If blow drying, finish each section with the cool shot button. This helps to rapidly close the hair cuticle, locking in the style and boosting shine. A closed cuticle also helps protect color!
- Let Curls Cool: When curling, let the curl cool completely in your hand or clipped up before you touch or brush it. This helps the curl set properly so it lasts longer (meaning less need for touch-ups later = less heat!).
- Finishing Product (Optional): A lightweight, color-safe serum or oil applied sparingly to the ends after styling can add shine, tame flyaways, and provide a final layer of protection.
Be Realistic & Give Your Hair Breaks
Even with the absolute best heat styling routine to avoid color damage, heat is still heat. Try to incorporate air-dry days into your week whenever possible. Embrace your natural texture sometimes!
And remember that regular trims and using a Weekly Masking Routine for Damaged Color-Treated Hair are also crucial backups to keep your hair healthy and resilient.
Protecting your color doesn’t mean giving up the styles you love. It just means being smarter and more intentional about how you use your tools. Implement these steps consistently, and you’ll see a huge difference in how vibrant your color stays and how much healthier your hair feels!
Frequently Asked Questions (FAQ)
Q1: Is blow drying less damaging than using a flat iron or curling iron?
A: Generally, yes, if done correctly. Blow drying involves less direct, intense contact time than clamping hair between hot plates. Using medium heat, keeping the dryer moving, using a nozzle, and applying heat protectant makes blow drying a relatively safer option compared to frequent ironing/curling.
Q2: If I use heat protectant, can I use higher heat settings more safely?
A: Heat protectant helps reduce damage, but it doesn’t make your hair invincible! It’s still always best to use the lowest effective temperature for your hair type, even with protectant. Think of it as a crucial safety net, not a license to use extreme heat.
Q3: Do I need different heat protectants for blow drying vs. ironing?
A: Some products are specifically marketed for blow drying (often lighter sprays) vs. high heat ironing (sometimes creams or more silicone-heavy sprays). However, many modern heat protectants offer protection up to 450°F and are suitable for both. Check the label! Using one designed for high heat before ironing is always a good idea.
Q4: My hair is already damaged and colored. Should I avoid heat completely?
A: Minimizing heat is definitely ideal for very damaged hair. Focus on air drying and heatless styling methods as much as possible. When you must use heat, follow this routine meticulously, use the lowest possible heat setting, and invest in quality bond-repairing treatments and masks (like our Weekly Masking Routine).