How to Diffuse Curly Hair for Defined, Frizz-Free Results
Learning how to diffuse curly hair can help you get soft, bouncy curls with less frizz and better volume. The right routine can make your curls dry faster, look healthier, and keep their shape with minimal effort. Simple changes to how you dry your hair make a big difference for definition and shine.
If you want to upgrade your curly hair game, finding the best way to use a diffuser is an easy place to start. With the right tips, you can avoid common mistakes and make your curls look their best every day.
Key Takeaways
- Start with clean, well-prepped hair for the best results
- Use simple steps to diffuse curly hair for volume and curl definition
- Healthy habits keep your curls looking smooth and shiny after drying
Essential Preparation for Diffusing Curly Hair

Getting your curls ready for diffusing helps you get more definition, less frizz, and healthier hair. Each step, from washing to applying products, affects how your curls turn out.
Choosing the Right Shampoo and Conditioner
Pick a gentle, sulfate-free shampoo that cleans without stripping away your hair’s natural oils. Curly hair tends to be drier, so a moisturizing formula works best.
Look for conditioners with hydrating ingredients like shea butter, aloe, or coconut oil. A rich conditioner can soften curls and make them more manageable.
Check the labels and avoid products with heavy silicones or alcohols that can dry out curls. Using the right shampoo and conditioner helps your hair hold its curl pattern and reduces frizz during and after diffusing.
Detangling Techniques for Curly Hair
Detangling needs a careful touch. Start when your hair is soaking wet and has conditioner in it.
Use your fingers first to gently work through any knots. If needed, use a wide-tooth comb to detangle, starting at the ends and moving upward. Don’t tug or pull, as this can cause breakage or split ends.
Sectioning your hair into parts makes it easier and avoids missing any tangles. Being gentle during detangling keeps your curl pattern intact and helps you avoid frizz.
Applying Leave-In Products and Heat Protectant
After washing and detangling, apply a leave-in conditioner or curl cream to damp hair. Scrunch the product in using your hands to help define curls and lock in moisture.
Before using a diffuser, add a heat protectant spray or cream. This shields your hair from heat damage and dryness. Choose a product labeled for curly or textured hair for the best results.
Wait until your hair is about 80% dry to add any extra styling products or oils after diffusing. Using leave-in products and a good heat protectant prepares your curls for styling and keeps them looking healthy and shiny. For more tips, check out this step-by-step guide on prepping hair before diffusing.
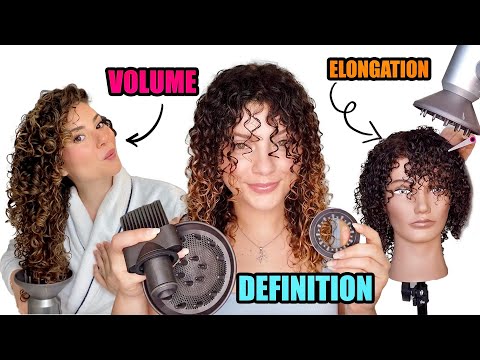
Step-by-Step Guide to Using a Diffuser

Using a diffuser helps you dry your curls without losing their shape or causing excess frizz. A few careful steps will keep your curls looking defined, healthy, and bouncy.
Sectioning Hair for Even Drying
Start by gently detangling your damp hair with your fingers or a wide-tooth comb. This helps prevent knots and makes sectioning easier. Use hair clips to split your hair into 3–4 sections, depending on your thickness and curl pattern.
Focusing on small sections lets you target each area for even drying. Clip away the parts you’re not working on so they stay out of the way.
Begin drying at the ends and move up toward the roots. By working on one section at a time, you avoid missing spots and help curls dry uniformly. For extra lift at the roots, you can also use root clips before diffusing. This will add more volume and help curls hold their shape.
Setting the Optimal Temperature and Speed
Choose a low or medium heat setting to protect your curls from heat damage. High heat can make hair frizzy or dry it out too fast. Medium speed is usually best for most hair types because it moves enough air to dry hair without blowing your curls apart.
Always apply a heat protectant spray before you start. If you notice hot spots or smell anything burning, turn the heat down right away.
For tighter curl patterns or if your hair is very fine, stick to lower temperatures and slower speeds. This gives you more control and stops curls from becoming puffy or losing their pattern. You can alternate between warm and cool settings to help lock in shape and cut down on frizz. More tips about settings for heat and speed can be found in guides like the one on how to diffuse curly hair.
Best Hands-Free Diffusing Methods
Hands-free diffusing helps you avoid touching your hair too much, which reduces frizz. Tilt your head to the side or flip your head upside down so the curls fall naturally into the diffuser bowl.
Let the diffuser gently cup the curls, holding it in place for 20–30 seconds on each section before moving. Avoid pressing the diffuser against your scalp too hard. Move the diffuser slowly around your head to cover all sections.
If your dryer allows, you can rest it on the counter for true hands-free drying. Just make sure to rotate your head to properly reach each side. Using this method keeps your curls defined and bouncy with less overall frizz. For more techniques, check tips on best hands-free diffusing methods.
Advanced Tips for Enhancing Curl Definition
To bring out your best curls, pay attention to both technique and product application. Small changes in your routine can help you create more defined curls, extra volume, and less frizz during the diffusing process.
Scrunching and Clumping Techniques
Scrunching helps curls to spring to life and gives them a tighter shape. Apply a curl cream, gel, or mousse while your hair is still wet. Flip your head forward and use your hands to gently squeeze upward, encouraging ringlets to form.
Clumping is the goal of helping curls group together rather than separate. For best results, comb your conditioner through your hair using your fingers or a wide-tooth comb before rinsing it out. This gets curls to stick together in sections.
You can repeat the scrunching process after adding styling products or while using a microfiber towel to absorb excess water. Avoid using rough towels that can break up curl clumps or create frizz. Use a light touch to keep your curls defined.
Root Lift for Volume
Creating volume at the roots can make your curls look fuller. Use a diffuser with the prongs or “fingers” pressed gently to your scalp. Tilt your head to different sides as you dry, letting gravity and airflow lift the roots.
Try gently shaking out your roots with your fingers while diffusing. Avoid constant touching, as it can create frizz, but a little movement helps roots from sticking flat to your head. For extra volume, you can use a root-lifting spray or volumizing mousse right at the scalp.
Keep the dryer at a lower speed at the roots. This gives you control and helps keep the curl shape without blowing the hair around, which can flatten the roots instead of lifting them. Drying in sections can also help each area get proper lift.
Reducing Frizz While Diffusing
Minimizing frizz starts with proper product use and gentle techniques. Always use a leave-in conditioner or anti-frizz serum before diffusing. These products help lock in moisture and create a barrier for each curl strand.
Set your diffuser to low or medium heat and a low speed. High heat can cause dryness and more frizz, so it’s best to be patient for a smoother finish, as explained in diffusing guides.
Refrain from touching your hair while it’s drying. Let your curls cool down before moving or fluffing them. If you need to separate curls, do it only after they are fully dry for the most defined and frizz-free curls.
Maintaining Healthy Curly Hair After Diffusing

Taking care of your curls after using a diffuser is just as important as diffusing them the right way. Small changes in how you cool, style, and protect your hair can make a big difference in keeping curls soft and defined.
Proper Cooling and Finishing Routines
Letting your hair cool down fully before touching or moving it helps set your curl pattern and minimize frizz. After diffusing, use the cool setting on your dryer for 1-2 minutes to seal the cuticle and help prevent moisture loss. This quick step makes curls look shinier and feel smoother.
Once your hair is cooled and dry, avoid running your fingers through it right away. Instead, gently shake out the roots or scrunch the curls very lightly if you want extra volume. This keeps your curl definition in place and reduces unwanted frizz. If you can, let your hair air-cool for a few minutes after using the diffuser for the best results. Learn more about this step from Davines’ tips on diffusing.
Post-Diffusing Styling Products
Applying the right styling products after diffusing helps control frizz, keep curls in place, and lock in moisture. The most popular options are gels, creams, and oils:
| Product Type | What It Does | When to Use |
|---|---|---|
| Gel | Holds curls, fights frizz | After cooling hair |
| Cream | Softens curls, adds shine | While hair is still damp |
| Oil | Seals moisture, tames flyaways | After other products dry |
Use a humidity-resistant gel for strong hold if you live in a humid area. Many people like gel for its ability to keep curls shaped all day, especially in challenging weather conditions. If your hair feels dry, add a leave-in conditioner before styling. Apply products evenly by smoothing over your curls with your palms, not combing through them. See advice on using humidity-proof post-diffusing gels for extra control.
Nighttime Protection for Curls
How you protect your hair overnight can impact your curls’ health and shape. Sleeping on a cotton pillowcase can cause friction and break curls apart. Instead, use a satin or silk pillowcase to help curls glide smoothly and reduce frizz.
Try different nighttime techniques:
- Pineapple your hair loosely at the top of your head to keep curls from flattening.
- Wear a satin or silk bonnet or scarf.
- If you have shorter hair, use a satin-lined sleep cap.
Avoid tight hairstyles or tying your hair too close to the scalp as this can stretch or damage the curl pattern. With these steps, you wake up with curls that need less restyling and stay looking defined for longer.