How to Braid Your Own Hair for Beginners (Guide)
Learning how to braid your own hair can seem tricky, but with the right steps, anyone can do it. You can master simple braiding techniques at home using a few easy tips and some practice. Braiding is practical for keeping hair neat and adds style to your everyday look.
Whether your hair is long or short, these beginner-friendly instructions will help you get started. If you’re ready to try something new, this guide will show you how to braid your own hair.
Key Takeaways
- Start with clean, brushed hair to make braiding easier
- Practice basic braiding steps and patterns
- Keep your braids neat and secure for a polished style
Preparing Your Hair for Braiding

Getting your hair ready helps make braiding easier and keeps your braid neat. Clean, smooth hair and the right tools are important when learning to braid for the first time.
Washing and Detangling
Start with clean hair. Wash your hair with shampoo to remove dirt and oil. Condition your hair to keep it soft and less prone to breakage while braiding. If your hair is too slippery after washing, let it air dry until it is slightly damp or use a towel to pat it dry. Hair that’s a little damp holds braids better and is easier to work with.
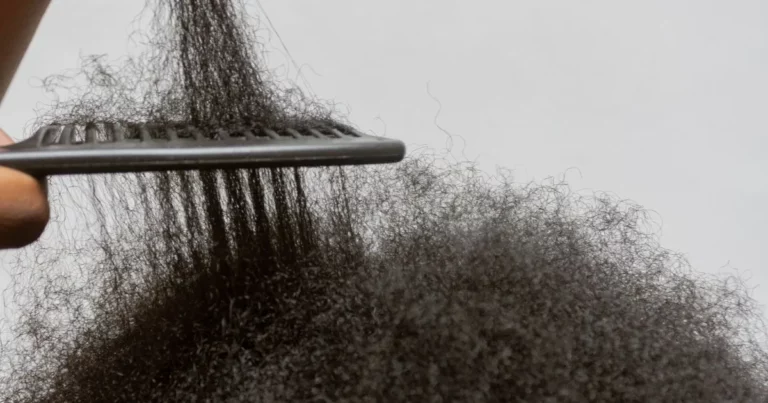
After washing, gently detangle your hair using a wide-tooth comb or a brush meant for detangling. Start at the ends of your hair and work your way up to the roots. This helps prevent damage and makes it easier to part your hair. If you have curly or textured hair, detangle in small sections to avoid pulling.
Pay attention to knots or tangles. Take your time and use your fingers to gently work them out. Smooth, tangle-free hair makes braiding quicker and keeps the braid looking neater.
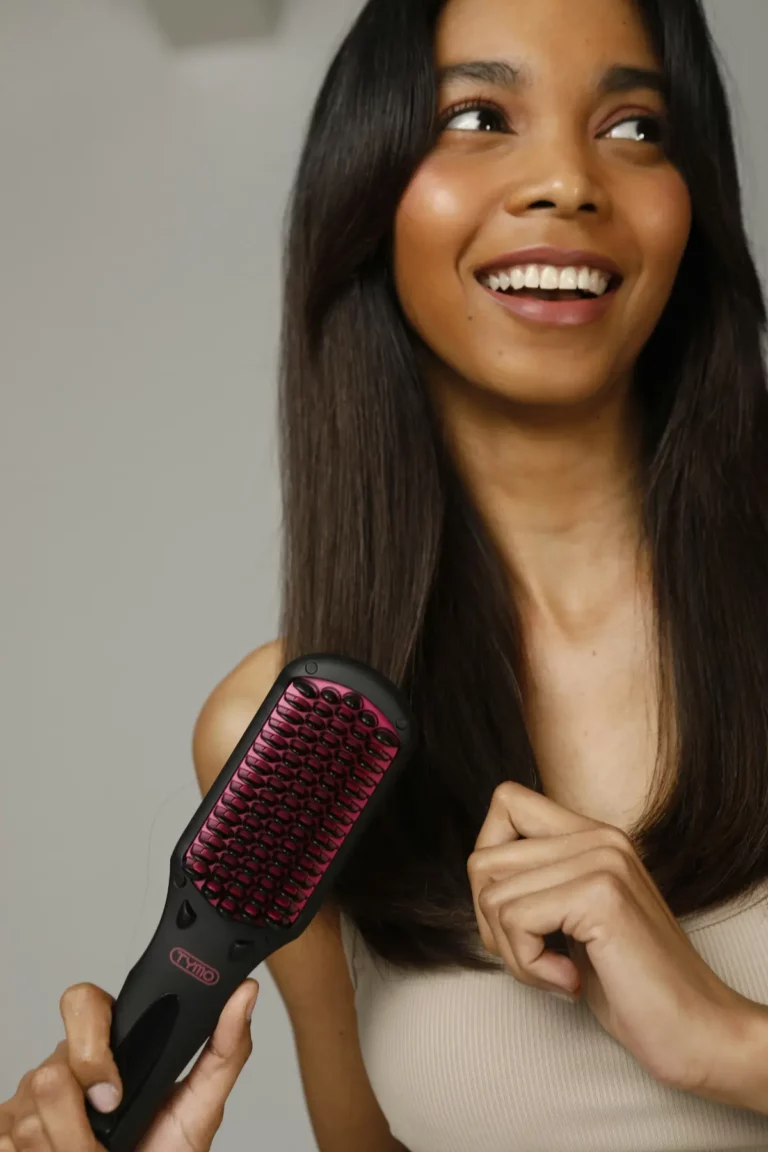
Choosing the Right Tools
Having the proper tools saves time and prevents frustration. Use a wide-tooth comb for detangling and a rat-tail comb for making straight parts. A brush can help smooth out large sections, especially if your hair gets frizzy. If you have thick or curly hair, a detangling brush can be helpful.
For holding sections apart, use hair clips or hair ties. Choose ties that do not pull or snag your hair. Many people use small, snag-free elastics at the end of their braids because they keep the hair in place without causing breakage.
Keep a spray bottle of water nearby if your hair dries quickly. Lightly misting your hair can make it easier to grip and control as you braid. You may also want some leave-in conditioner or a light styling cream to help avoid flyaways and hold your braid longer.
Sectioning Your Hair
Dividing your hair into clean, even sections is a basic step for all types of braids. Use a rat-tail comb for precise parts. If you are braiding your whole head, start by parting your hair down the middle or to the side, depending on the style you want. For a simple three-strand braid, gather all your hair at the back or to one side and split it into three equal sections with your fingers.
For more detailed styles like French braids, work with smaller sections and use clips to keep hair out of the way. Make sure your parts are as straight as possible for a neat look. If you want easier control, braid smaller sections rather than large chunks.
Smooth each section before you begin. This makes the braiding process simpler and prevents bumps or unevenness. If you’re having trouble keeping the sections apart, use the clips or ties to secure them while you work. Taking your time with sectioning means a cleaner, more polished final braid.
For an illustrated guide, check out the step-by-step instructions linked in this beginner’s braiding guide.
Basic Braiding Techniques
Braiding your own hair can seem tricky at first, but learning the basics step by step will make it much simpler. Knowing how to do a three-strand braid, a French braid, and a Dutch braid opens up many style options.
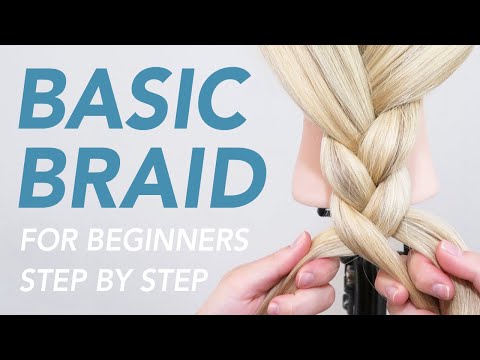
Three-Strand Braid Tutorial
The three-strand braid is the most common and easiest way to braid your hair. First, brush your hair to remove any tangles. Gather all your hair at the back or on the side.
Split your hair into three equal sections. Hold the left section in your left hand, the right section in your right hand, and let the middle hang free. Cross the right section over the middle section. Then cross the left section over the new middle. Repeat this process until you reach the end.
Secure your braid with a small hair tie. You can braid as tightly or loosely as you prefer. This simple style works for both long and short hair. You can see more step-by-step instructions for beginners in this hair braiding guide.
French Braid Steps
A French braid starts at the crown of your head and goes down toward your neck. Start by brushing your hair and taking a small section at the top of your head. Divide this section into three equal strands as if you were starting a basic braid.
Begin crossing the right section over the middle, then the left over the new middle. Each time you cross, add a small section of hair from the loose hair at the sides. Keep adding hair in each step as you braid downward.
Once you run out of hair to add, finish with a regular three-strand braid and secure it with an elastic. The French braid keeps your hair neat and works well for both daily and active styles.
Dutch Braid Instructions
The Dutch braid is similar to the French braid, but the strands go under instead of over. Start by brushing your hair and separating a section at the crown. Divide this section into three pieces.
Cross the right strand under the middle, then cross the left strand under the new middle. Each time you move a piece, add extra hair from each side to the braid. This technique makes the braid look like it sits on top of your hair, creating a raised effect.
Keep braiding down, adding hair with each step, until all your hair is braided. When finished, tie it off with a hair band. For a full step-by-step example, you can watch this Dutch braid tutorial.
Troubleshooting Common Braiding Challenges
Learning to braid your own hair gets easier with practice, but some problems are common for beginners. Addressing layers, keeping braids secure, and making sure your braids feel comfortable are important for good results.
Managing Layers and Flyaways
Dealing with hair that has many layers or short pieces can make braiding tough. Short hairs often stick out or slip from the braid. To help, you can use a small amount of styling cream or gel. This keeps your hair smooth and makes it easier to control flyaways.
A fine-tooth comb helps you gather all the strands and keep them neat. Try braiding with gentle, steady tension. This keeps the layers together. Bobby pins or small hair clips are helpful for tucking in stubborn flyaways as you work. If you prefer, a light mist of hairspray after braiding will also hold everything in place.
If a section keeps popping out, unbraid only that part and tuck it back in, then keep going. For very layered hair, start the braid lower, so the short pieces stay hidden in the finished plait. For more tips, see how people on Reddit recommend managing sections for braiding.
Securing Braids Effectively
A braid will loosen or unravel if not tied off well. Choose a hair tie that is snug but gentle on your hair. Tiny elastic bands work best for thin or short braids, while thicker bands work for larger braids. Always wrap the band around the end as many times as needed until it feels secure.
If your hair is slippery or fine, use a textured band instead of smooth plastic. You can also twist a small section of hair around the end of your braid and tuck it under the hair tie for extra grip. For special occasions or a tighter hold, add a dab of styling gel or use two bands a half-inch apart at the end.
When braids loosen during the day, gently pinch the loose spot and tug the base of the braid to tighten it. Then secure the bumpy spot again with pins or a small amount of hair wax. See step-by-step instructions in this braid guide for beginners.
Adjusting Tension for Comfort
Too-tight braids can hurt your scalp and may even pull out hair. Too-loose braids fall apart fast. To find the right balance, braid using light to moderate tension. As you cross each section, check if it feels snug but not painful.
If you feel pain or a lot of pulling, gently loosen the braid and redo that part. Sometimes wet or damp hair feels tighter as it dries, so adjust tension after your hair is dry if needed. Never sleep with very tight braids.
Massage your scalp with your fingertips after braiding. This relieves any pressure and keeps your scalp comfortable. If you’re new to braiding, start with slightly loose braids. With practice, you’ll learn how much tension your hair type needs for a secure, comfortable style. Practicing with larger sections first can help you control tension more easily, as mentioned in beginner braiding tips online.
Maintaining and Styling Braids

Keeping braids looking fresh, comfortable, and fun involves more than just the braiding itself. Small changes to your routine and the right accessories can make your braids last longer and feel new each day.
Protecting Braids Overnight
Sleeping with braids without proper care can lead to frizz and damage. To help your braids hold their shape, use a satin or silk scarf to wrap your head before bed. You can also use a satin pillowcase if scarves are not comfortable for you.
Try not to sleep with wet or damp hair in braids, as this may loosen them and cause tangling. In the morning, smooth down any flyaways with a dab of lightweight oil or a non-greasy leave-in conditioner.
A loose braid or two at night instead of tight styles is a good way to prevent breakage, especially if you move around a lot in your sleep. This gentle approach also keeps your scalp comfortable and healthy. For more tips on caring for braids, you can check beginner guides like this one.
Adding Accessories
Adding hair accessories can change the look of your braids in seconds. Popular options include:
- Beads
- Colorful elastics
- Ribbons
- Hair rings
- Decorative pins or clips
Always put accessories on gently to avoid pulling or breaking hair. Cloth-wrapped elastics are softer on hair than thin rubber bands. For a playful look, braid a ribbon or string into one or two sections. Hair cuffs and small rings can be clipped close to your scalp or styled evenly along the braid length for a bold effect.
Mixing and matching accessories allows you to match your braids to events, seasons, or even your mood. With these small touches, you can make your braids stand out at school, work, or a party.
Transitioning to Other Hairstyles
When you are ready to change your look, take your braids out carefully to avoid tangling. Start by gently removing all accessories and untying the ends. Work from the bottom up, using your fingers or a wide-tooth comb.
Braids can leave hair with natural waves or texture once undone. This gives you a quick, heat-free way to enjoy wavy hair for a day or two. If you want a smoother style, brush out your hair gently and add a little leave-in conditioner for shine.
You can switch to a high ponytail, bun, or simply leave your hair down after taking out the braids. Try not to braid or restyle tightly right away, as your hair and scalp can use a short break between styles to stay healthy. For easy visual guides, beginner-friendly video tutorials like this one are helpful.