How to Style Knotless Braids (Multiple Choices)
Knotless braids offer versatility that goes beyond just wearing them down. If you’ve recently gotten this protective style, you might be wondering how to keep your look fresh and interesting throughout the weeks you’ll be wearing them.
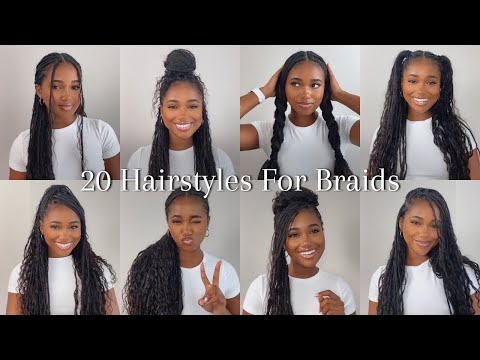
You can style your knotless braids in at least 30 different ways including half-up looks, buns, updos, and braided styles that transform your appearance without disturbing the integrity of the braids.
Whether you’re heading to work, going out for the evening, or just wanting to change things up, learning a few styling techniques will give you the confidence to rock your knotless braids in multiple ways. From simple half-up styles to more elaborate braided updos, the possibilities let you customize your look for any occasion.
Understanding Knotless Braids
Knotless braids offer a modern twist on traditional braiding techniques, providing both style and comfort. They’ve gained popularity for their seamless look and reduced tension on the scalp.
What Makes Knotless Braids Unique
Knotless braids start with your natural hair and gradually incorporate extensions as you braid downward. Unlike traditional methods, there’s no knot at the root, creating a flatter, more natural-looking base. This braiding technique reduces tension on your scalp, making it more comfortable for everyday wear.
The installation process involves:
- Starting with your natural hair
- Gradually feeding in synthetic hair as you braid
- Creating a seamless transition between natural hair and extensions
This method creates less bulk at the roots and gives a more natural appearance. Your scalp will thank you for choosing this gentler alternative that minimizes pulling and potential damage.
Knotless Braids vs. Traditional Box Braids
The main difference between knotless and traditional box braids lies in the installation technique. Traditional box braids start by anchoring extension hair with a knot at the root, which can create tension and discomfort.
Key differences:
| Feature | Knotless Braids | Traditional Box Braids |
|---|---|---|
| Installation | Gradual feed-in | Extensions anchored with knot |
| Weight | Lighter | Heavier |
| Tension | Less tension | More tension |
| Look | Flat, natural-looking roots | More visible beginning point |
| Installation time | Generally longer | Typically faster |
Knotless braids tend to last just as long as traditional box braids while being gentler on your edges and hairline.
Choosing the Right Braid Size and Hair Type
Selecting the appropriate braid size and hair type depends on your desired look, lifestyle, and hair goals. Large knotless braids install faster and create a bold statement, while smaller braids offer versatility and typically last longer.
Braid sizes to consider:
- Micro: Extremely thin, time-intensive but very versatile
- Small: Detailed look with many styling options
- Medium knotless braids: Popular middle ground, balancing style and installation time
- Large: Quick installation, lighter weight, but may not last as long
Synthetic hair works well for most knotless braids, but consider human hair for a more natural look. Pre-stretched braiding hair saves time and creates smoother results. Your natural hair texture isn’t a limiting factor—knotless braids work as a protective style for virtually all hair types.
Preparing Natural Hair for Knotless Braids

Before installing knotless braids, proper preparation of your natural hair creates the foundation for healthy, long-lasting results. Properly prepared hair prevents breakage, reduces tension, and ensures your scalp stays healthy throughout the braiding process.
Detangling and Moisturizing
Start by washing your hair with a clarifying shampoo to remove product buildup. This gives you a clean slate for your knotless braids. Detangle your hair while it’s wet and coated with conditioner using a wide-tooth comb.
Begin detangling from the ends and work your way up to the roots. This gentle approach prevents unnecessary breakage and minimizes pain. A detangling brush or wide-tooth comb works best for this process.
After detangling, deep condition your hair for at least 30 minutes. This adds much-needed moisture and strength to your strands before braiding. Rinse thoroughly with cool water to seal the hair cuticles and lock in moisture.
For extremely dry hair, consider a protein treatment a week before braiding. This reinforces hair strands and prevents breakage when tension is applied during the braiding process.
Using Leave-In Conditioner and Hair Oil
Apply a generous amount of leave-in conditioner to damp hair. Focus on the ends, which tend to be drier and more prone to breakage. The leave-in creates a protective barrier and adds lasting moisture.
Follow with a lightweight hair oil to seal in the moisture. Focus on natural oils like jojoba, argan, or coconut oil that penetrate the hair shaft without leaving a heavy residue. Distribute evenly through your hair using your fingers.
Avoid using heavy butters or creams that can cause buildup. These products can make your braids look dull and create scalp issues over time.
A light misting with a water spray bottle mixed with aloe vera juice can provide extra hydration. This mixture helps maintain scalp health throughout the duration of your protective style.
Sectioning and Managing Hair with Tools
Divide your hair into 4-6 main sections using hair ties or clips. This makes the braiding process more manageable by keeping already detangled hair separate. Smaller sections are easier to work with, especially for beginners.
Use a precision parting comb for clean, even partings. The fine-tooth end creates precise parts while the wider end helps with detangling. Sectioning clips keep hair neatly organized as you work.
Prepare all your tools beforehand: rat-tail comb, sectioning clips, edge brush, and hair ties. Having everything ready will make the process smoother and more efficient.
Consider using a light holding gel or mousse on each section before braiding. This helps control flyaways and creates a smoother braid with less frizz. Apply sparingly to avoid product buildup on your scalp.
If braiding your own hair, positioning mirrors strategically around you helps with visibility. This setup allows you to see the back of your head clearly for even partings.
Step-By-Step Guide: How to Style Knotless Braids

Styling knotless braids requires proper technique, quality materials, and attention to detail for both aesthetics and scalp health. These practical steps will help you achieve beautiful results while maintaining comfort.
Braiding Process and Technique
Start with clean, detangled hair that’s been moisturized with a light oil or leave-in conditioner. Section your hair carefully using a precision parting comb for clean, even parts.
Begin each braid with your natural hair only. This is what creates the “knotless” effect. Take a small section of your own hair and split it into three strands.
Start a standard three-strand braid, completing 1-2 inches before adding extensions. When adding extensions, feed in small amounts gradually rather than all at once. This technique creates a more natural look and better grip.
For beginners, practice your grip technique first. Hold the hair firmly but not too tight. Your braids should feel secure without pulling excessively on your roots.
Maintain consistent tension throughout the braiding process for uniform braids. Work your way down, keeping the braid neat and tight as you go.
Incorporating Hair Extensions and Human Hair
Choose quality synthetic or human hair extensions that match your desired look. For a more natural appearance, select extensions that closely match your natural hair texture and color.
Before installing, stretch your braiding hair by pulling it firmly between your hands. This removes crimps and makes for smoother braids.
When feeding in extensions, add small portions at a time for a seamless transition. Place the extension on top of your natural hair and incorporate it into your three-strand technique.
For beginner-friendly installation, hold your natural hair in one hand and the extension in the other. Gradually feed the extension into your braid while maintaining your three-strand pattern.
Continue adding extensions until you reach your desired thickness. Keep the tension consistent but comfortable throughout this process.
Ensuring Comfort and Scalp Care
Pay close attention to tension while braiding. You should feel secure braids without pain or excessive pulling on your scalp. If it hurts, it’s too tight!
Take regular breaks during the braiding process to give your scalp and hands some rest. The entire process can take several hours depending on size and quantity.
Apply a light oil to your scalp before and after braiding to prevent dryness. Jojoba or almond oil works well for most hair types.
For those with sensitive scalps, consider taking an anti-inflammatory pain reliever before starting. This can help reduce discomfort during the installation process.
Sleep with a satin bonnet or on a satin pillowcase to protect your braids and reduce friction. This also helps maintain your edges and prevent frizz.
Maintaining a Seamless and Natural Appearance
Style your knotless braids in various ways to keep your look fresh. You can try 15 different styles including high ponytails, half-up styles, or elegant updos.
For curly ends, use hot water dipping or flexi rods to create beautiful curls. The curly ends technique adds volume and dimension to your braids.
Keep edges neat with a soft bristle brush and edge control gel. Apply sparingly to avoid product buildup.
Refresh your style every 2-3 days with a light spritz of water mixed with leave-in conditioner. Gently pat down any flyaways with a small amount of mousse.
To maintain cleanliness, use a spray bottle filled with witch hazel and water to cleanse your scalp between washes. Apply oil afterward to prevent dryness.
Styling and Maintaining Knotless Braid Looks
Knotless braids offer incredible versatility while protecting your natural hair. With proper styling techniques and maintenance, these braids can remain beautiful and healthy for weeks.
Popular Knotless Braid Styles and Variations
Knotless braids can be styled in numerous ways to match your mood or occasion. Try a simple half-up, half-down style for casual outings or work days. This effortless look keeps hair out of your face while showcasing your braids.
For more formal events, consider a sleek high bun. Gather your braids at the crown of your head and secure with a hair tie. Wrap the braids around the base and pin in place for an elegant updo.
Goddess knotless braids combine traditional box braids with loose curly ends for a romantic look. These can be styled in various ways, including ponytails, side-swept designs, or loose cascading patterns.
Try experimenting with 20 different styling options like space buns, braided crowns, or side braids to keep your look fresh and exciting.
Improving Longevity and Durability
To extend the life of your knotless braids, sleep with a satin or silk bonnet or pillowcase. This reduces friction and prevents frizz while preserving your style.
Avoid excessive washing as this can create frizz and loosen braids. Instead, use a diluted shampoo or cleansing foam on your scalp once every 1-2 weeks.
Quick maintenance tips:
- Apply lightweight mousse to tame flyaways
- Use edge control to smooth edges for a polished look
- Retwist loose edges with small amounts of gel
- Apply light oil to the length of braids to maintain shine
Avoid heavy products that cause buildup, as these will make your braids look dull and feel heavy over time.
Care Tips for Natural Hair Growth and Health
While protective styling is beneficial, proper care of your natural hair underneath is crucial. Moisturize your scalp regularly with a light oil like jojoba or almond oil using a dropper applicle.
Avoid installing braids too tightly, as tension can lead to breakage and traction alopecia. Your braids should feel comfortable, never painful.
Give your hair breaks between installations. Experts recommend 1-2 weeks without braids for every 6-8 weeks with them to allow your scalp to breathe.
Healthy scalp practices:
- Massage your scalp gently to stimulate blood flow
- Use tea tree or peppermint oil diluted in a carrier oil to prevent itching
- Cleanse thoroughly when removing braids
- Deep condition your natural hair before new installations
Frequently Asked Questions
Knotless braids offer versatile styling options while maintaining healthy hair and scalp. These protective styles can transition from casual to formal settings with minimal effort and proper maintenance techniques.
What are the easiest ways to style knotless braids for beginners?
For beginners, start with simple half-up, half-down styles by sectioning your braids horizontally across the crown and securing with a hair tie. This creates an elegant look with minimal effort.
Try a simple high ponytail by gathering all your knotless braids at the crown of your head. Secure with a satin scrunchie to prevent breakage and add a touch of style.
A braided bun works well for those new to styling. Gather your braids into a ponytail, twist them around the base, and secure with bobby pins. This takes about 5 hours to complete initially but styling takes just minutes.
Space buns offer a playful yet simple option. Part your hair down the middle, create two high ponytails, and wrap each into a bun. Secure with pins and loosen a few braids around your face for a softer look.
Can you provide visuals or pictures illustrating different knotless braid styles?
Many online tutorials show step-by-step styling techniques for knotless braids. YouTube channels feature detailed videos on creating fluffy twists and flat styles using knotless braids.
Instagram hashtags like #knotlessbraids and #protectivestyles showcase thousands of styling ideas with visual references. Save posts that match your braid length and thickness for inspiration.
Pinterest boards dedicated to knotless braid styling provide organized visual collections. Create your own board to save styles you want to try based on different occasions and outfit pairings.
What are some professional ways to style knotless braids for work?
A sleek low bun projects professionalism while protecting your braids. Gather your braids at the nape of your neck, twist into a bun, and secure with bobby pins. This style keeps braids neat and off your face during work hours.
Try a half-up top knot for a polished yet modern look. Pull the top section of braids into a neat bun while leaving the rest hanging. This balances professionalism with personal style.
For corporate settings, consider a braided crown. Wrap your knotless braids around your head and secure with pins. This elegant style keeps hair contained and looks sophisticated with blazers and business attire.
A side-swept style with a decorative clip works well for creative workplaces. Sweep braids to one side and secure with a minimalist metal clip or comb for a refined yet artistic appearance.
How can I style my short knotless braids in a trendy fashion?
Short knotless braids look great with decorative edge control and baby hairs styled into swoops and waves. This adds personality to shorter styles while maintaining a polished look.
Try asymmetrical styling by parting your short braids deeply to one side. This creates volume and dimension while highlighting your facial features. Secure with decorative pins if needed.
Add colorful cuffs or beads to the ends of short braids for visual interest. These accessories draw attention to the style and can be coordinated with your outfit or mood.
For an edgy look, consider an undercut with your short knotless braids. This creates contrast and allows for versatile styling options as your hair grows.
What are some tips for keeping knotless braids looking fresh and well-maintained?
Wrap your knotless braids with a satin scarf or bonnet at night to prevent frizz and preserve their neat appearance. Cotton pillowcases can cause friction that damages braids over time.
Apply light oils to your scalp weekly using an applicator bottle with a narrow tip. This keeps your scalp moisturized without creating buildup that can make braids look dull.
Touch up edges with a small amount of edge control and a soft brush when styling. This maintains a clean hairline and refreshes the overall appearance of your braids between washes.
Use dry shampoo between washes to absorb excess oil and keep braids looking fresh. Spray lightly at the roots and gently massage to distribute the product without creating frizz.
Are there creative methods to style knotless braids using accessories like claw clips?
Claw clips work wonderfully with knotless braids for creating half-up styles. Use a large clip to secure the top section of braids while leaving the bottom loose for an effortless, trendy look.
For a quick updo, twist braids into a loose bun and secure with a claw clip at the crown or nape. This creates a casual yet put-together style that can be adjusted throughout the day.
Try stacking smaller claw clips in a row down the back of your head for a unique style. Use clips in coordinating colors or patterns to create visual interest and personalize your look.
Knotless braids can be styled with feed-in methods where you incorporate clips along a center or side part. This creates structure while allowing the rest of your braids to flow naturally.