How to Dutch Braid Your Own Hair
You want to master the art of the Dutch braid on your own head, right? Good, because I have been there, wrestling with my arms at weird angles, wondering if I just needed a third arm or something. You can do this, even if your hair feels like a tangled mess most days. I will show you exactly how to do it.
Getting Started: Your Braid Prep Kit
Listen, you do not just wake up and magically braid your own hair, unless you are some kind of hair wizard. You need a few things first. Think of it like getting ready for a hair Olympics, but way less sweaty.
Tools You Actually Need
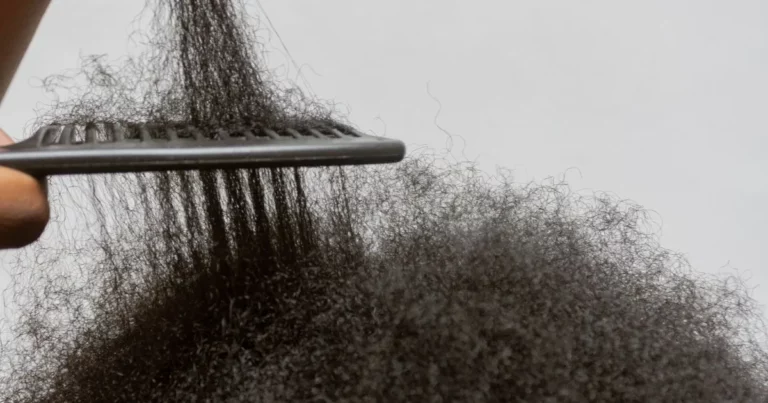
- A good brush or wide-tooth comb. You want zero tangles. Trust me on this one; a knot mid-braid is a nightmare.
- Hair elastics. The clear ones are practically invisible. Nobody wants a bright pink hair tie ruining their elegant braid.
- A mirror. Maybe two mirrors if you feel fancy. One for the front and one for the back helps a lot.
- Hair spray or styling cream for flyaways. Those little baby hairs have a mind of their own.
I remember this one time, I tried to braid my hair without looking. What a mistake. I ended up with a lump on one side and a string on the other. Do not be like me. Use the mirror.
The Sectioning Struggle is Real
This is where a lot of people just give up. They get confused about which way the hair goes. Do not worry about it. It is just hair. It will grow back if all goes wrong.
Creating Your Top Section
- Start with damp hair if you can. It gives you more control. Otherwise, a little styling cream through dry hair works wonders.
- Brush your hair back smooth. You want a clean part.
- Take a horizontal section of hair from the very top of your head, near your hairline. Think of it like you are drawing a straight line across your scalp with your comb. This section should be about two inches wide.
- Divide this section into three equal strands. This is your starting point.
Seriously, getting those three strands equal is harder than it sounds sometimes. Just eyeball it. It does not have to be perfect. No one is going to measure them with a ruler.
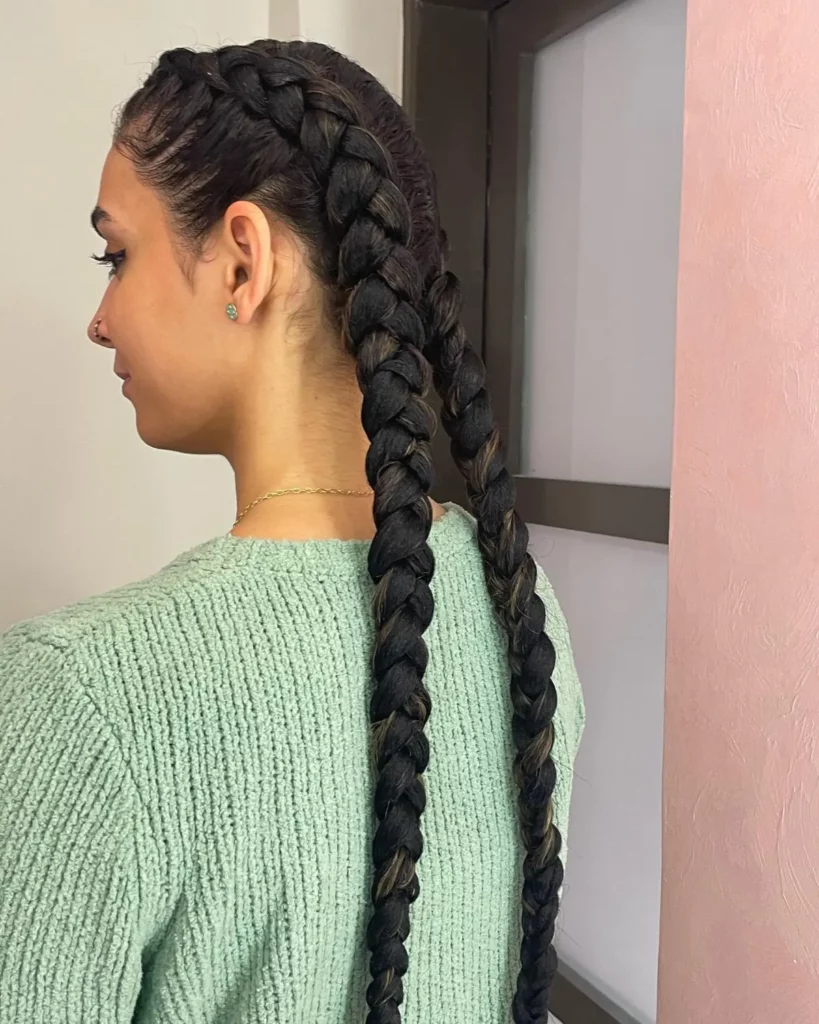
The Weaving Wizardry of the Dutch Braid
This is the main event. A Dutch braid, also known as a reverse French braid, means you are crossing strands under, not over. It makes the braid pop out more, which looks super cool.
Under, Under, Add More Hair
You can call it the “under” braid because you are going under, always under.
| Step | Action | Tip |
|---|---|---|
| 1 | Take the right-most strand and cross it UNDER the middle strand. | Hold strands firmly but not too tight. |
| 2 | Now take what is now the right-most strand (the one that was middle) and cross it UNDER the new middle strand. | Keep your fingers close to your head. |
| 3 | Before crossing the right-most strand under again, add a small section of loose hair from the right side of your head to that right-most strand. | Think of it like picking up crumbs from the floor, but softer crumbs. |
| 4 | Cross this combined, thicker right strand UNDER the middle strand. | Maintain consistent tension. |
| 5 | Repeat on the left side: Add a small section of loose hair from the left side to the left-most strand. Then cross this combined, thicker left strand UNDER the middle strand. | Do not pull too hard on the added sections. |
I find it helpful to look at it from the side in the mirror. Sometimes my arms get tired. I will take a little break then come back to it. It is okay. It is not a race.
Continuing Your Braid Down Your Head
Just keep repeating steps three, four, and five. You are going to continue adding new sections of hair from the sides as you move down your scalp. Your braid will grow and grow, becoming more prominent.
- Try to keep your sections of added hair consistent in size. This makes a tidy-looking braid.
- Keep your fingers as close to your scalp as possible. This prevents gaps and keeps the braid tight and neat.
- Angle your braid towards the back of your head as you go. You want it to follow the curve of your head.
Sometimes you might find the braid is pulling on one side more than the other. That is normal. Just adjust your tension a bit as you add hair. It is a learning curve, like trying to juggle oranges for the first time. You are going to drop a few.
Finishing Your Fantastic Braid
You are almost there. You probably have a few inches of hair left, or maybe a lot, depending on how long your hair is.
The Tail End
Once you have gathered all the loose hair from the sides of your head into your braid, you will just have three strands left. At this point, you can:
- Continue braiding those three strands in a regular three-strand braid (crossing under, of course, to keep the Dutch style consistent) until you reach the end of your hair. This makes a long, flowing braid.
- Secure the end with a hair elastic.
I usually just braid it all the way down. It looks neat. Plus, I like having something to fiddle with throughout the day.
Securing and Styling
Once your elastic is in place, you can gently tug on the loops of the braid to make it look fuller. This is called “pancaking” the braid. It is super simple and makes your braid look a little more voluminous, like you have more hair than you actually do.
A little hair spray or a tiny bit of styling cream smoothed over the top can help tame any stray hairs. Now, go admire your handiwork. You just braided your own hair. Who needs a hairstylist, right?
Troubleshooting Your Dutch Braiding Adventures
Hey, it is not always smooth sailing. Sometimes your arms get tired, or your hair decides to stage a rebellion. I get it.
Common Braid Blunders and How to Fix Them
There are a few things that come up again and again when people try this at home.
- Uneven braids: This usually comes from taking uneven sections of hair. Try to be more consistent with the amount of hair you add each time. Practice makes it better.
- Loose sections near the scalp: You might not be keeping your fingers close enough to your head. Really try to keep that tension right at the scalp.
- Sore arms: Yep, this is a real problem. Take breaks. Stretch your arms out. Maybe do one side at a time, then switch. Your shoulders will thank you.
- Hair getting tangly mid-braid: This happens if you do not brush your hair thoroughly first. Also, if your hair is very dry, a light mist of water or a tiny bit of leave-in conditioner can help. My hair is super fine, so it tangles if I just look at it wrong.
I once had a braid that started great but ended up looking like a rat’s nest at the bottom because I got lazy with the brushing. Never again. Brush, brush, brush.
FAQ
What is the difference between a French braid and a Dutch braid?
A French braid weaves the hair strands over the middle strand, making the braid lie flat against the head. A Dutch braid, however, involves crossing the strands *under* the middle strand, which makes the braid stand out and appear more prominent on top of your head.
Can I Dutch braid my own hair if it is short?
You can definitely try Dutch braiding shorter hair, but it can be more challenging to gather sections and keep them in place. Hair that is at least shoulder-length usually works best for a visible and lasting Dutch braid, but practice can help you adapt the technique to shorter styles.
How do I make my Dutch braid stay in all day?
To help your Dutch braid last, start with hair that is not too freshly washed; second-day hair often has more grip. You can also apply a light holding spray before and after braiding. Secure the end tightly with a good elastic, and consider using a few bobby pins to tuck in any stray hairs around the face or nape of the neck.
Is it easier to Dutch braid wet or dry hair?
Most people find it easier to Dutch braid slightly damp hair because it offers more control and grip, reducing flyaways. However, dry hair can also work, especially if you use a little styling cream or smoothing serum to tame frizz and add manageability. It is often a matter of personal preference and hair type.